


DTF Bank Sample Pack
Features
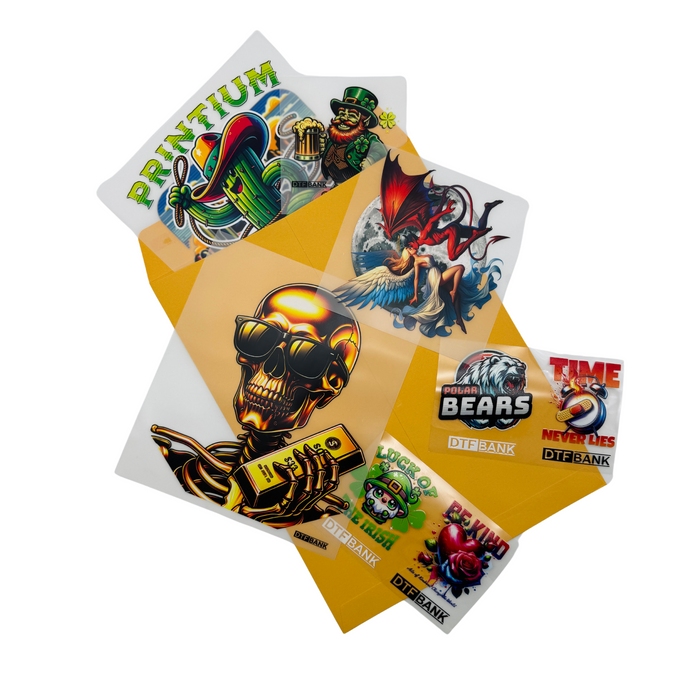
Sample Pack: The Professional Testing Solution
Testing new materials is vital for business success. The DTF Bank Sample Pack lets you try our premium quality. You can test our films and powders before buying in bulk. This ensures your printer and ink work perfectly together.
Our
What Is Included Sample Pack?
Our kit covers every stage of the transfer process. It includes our best-selling materials.
-
Premium Plus Film Sheets: Experience high ink loads without any bleeding.
-
Adhesive TPU Powder: Test the bonding strength and soft-hand feel.
-
Glossy & Matte Options: Compare different finishes for your custom apparel.
-
Settings Guide: Find recommended temperatures and times for perfect results.
Why You Should Order This Sample Pack
Testing new supplies is a smart move for any print shop. Our kit provides everything you need for success.
1. Verify Technical Compatibility
Every DTF printer has unique settings. RIP software profiles also vary between brands. This pack lets you test our film with your current setup. You can adjust your ink density without any risk. This ensures your final prints look exactly as planned.
2. Experience the Premium Texture
The feel of a garment is vital for customers. Our films and powders create a very soft finish. The prints remain stretchable and do not feel heavy. You can feel this "soft-hand" quality yourself. Your clients will love the professional and flexible results.
3. Confirm Industrial Durability
Quality must last through many laundry cycles. Use these samples to run your own wash tests. Our materials resist cracking and fading over time. You will see how the colors stay bright after washing. This builds trust between you and your customers.
4. Optimize Your Production Costs
Calibration often wastes a lot of material. Using a full pack for testing is very expensive. Our sample kit prevents this unnecessary waste. You can find the perfect heat settings cheaply. This helps you save money for larger production runs.
Sample Pack Step-by-Step Guide: How to Use Your Samples
Follow these clear steps to get the best results. Proper technique ensures a professional and lasting finish.
1. Sample Pack Prepare Your Design
Create a test file with various elements. Include fine lines and small text. Add solid color blocks to check ink density. Mirror your artwork before sending it to the printer. This test helps you find the perfect ink limits.
2. Print with Care
Load a sample sheet into your DTF printer. Ensure the matte side is facing the printhead. Print your CMYK layer first. Apply the white ink layer immediately after. The ink must remain wet for the next step.
3. Apply the TPU Powder
Spread the adhesive powder over the wet ink. Ensure the entire design is fully covered. Gently shake the film to remove excess powder. The powder should only stick to the printed areas. This creates a clean and precise transfer.
4. Cure the Design
Heat the film using a curing oven. You can also use a hovering heat press. Set the temperature to 150°C (302°F). Bake the film for about two minutes. The powder should look like melted orange peel.
5. Heat Press the Transfer
Place the film on your test garment. Press at 160°C (320°F) for 15 seconds. Use medium pressure for the best bond. This step fuses the design to the fabric fibers. Ensure the garment stays flat during the press.
6. Cool and Peel
Remove the garment from the heat press. Let the film cool down completely. A cold peel prevents damage to the design. Slowly pull the film away in one motion. You will see vibrant colors and sharp edges.
You are invited to join the DTF Bank world to stay updated on the latest printing techniques and find inspiration for your creative projects. Follow us on Instagram, Facebook, and TikTok to catch professional tips, product reviews, and exclusive deals. You can also subscribe to our YouTube channel for hands-on tutorials. If you are looking for visual ideas for your next project, explore our Pinterest boards, or connect with us on LinkedIn for corporate updates. For any questions or support requests, feel free to reach out to us anytime at info@dtfbank.com.